How to Get Light and Crispy Dosas Without Yeast Fast
 Feb, 11 2025
So, you're in the mood for a dosa — that delicious, crispy South Indian staple. But wait, there's no yeast in the pantry, and you don't have all day to let the batter rise. No problem! You've stumbled upon the right guide to help you whip up light, crispy dosas without yeast in less time than you'd expect.
The key to a great dosa lies in its batter and fermentation process, but that doesn't mean you need yeast to get things going. Instead, let's turn our attention to using readily available ingredients like rice and urad dal. A little fenugreek goes a long way too, enhancing fermentation without slowing you down.
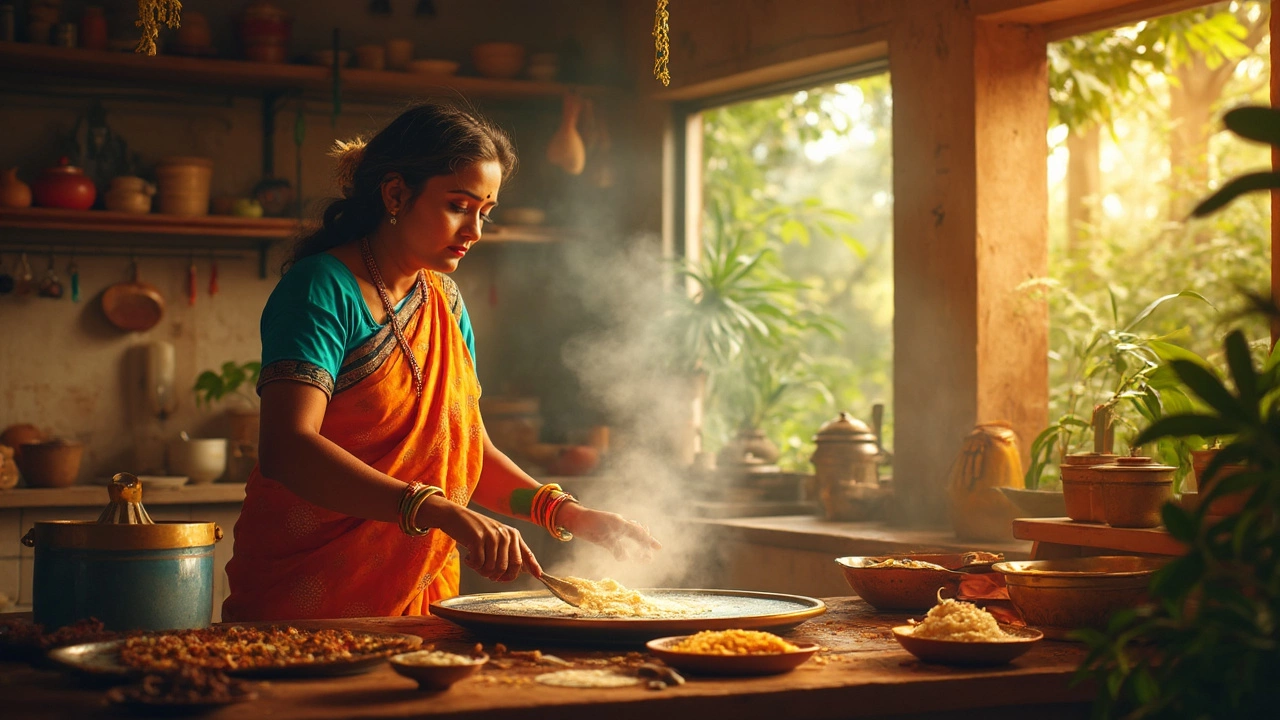
First things first, focus on getting the rice and urad dal ratio right — the magic start is often 3:1. Soak them separately for about four hours, then blend them together until you reach a smooth, slightly grainy batter. Now, the trick is not to let it sit forever. A warm spot in your kitchen works wonders for quick fermentation.
Having the right kitchen tools can save you tons of time too. A good non-stick pan and a flat spatula can make all the difference. Keep these handy to swiftly spread the batter into thin circles. With a bit of oil here and there, you've set yourself up for the perfect crispy crunch.
- Understanding Dosa Basics
- Yeast-Free Recipe Essentials
- The Perfect Batter Consistency
- Tools to Make the Process Easier
- Cooking Tips for Crispiness
- Serving Suggestions to Elevate Flavor
Understanding Dosa Basics
Dosas, a staple in South Indian cuisine, are thin pancakes made from a fermented batter. They're more than just a breakfast dish; they're a versatile meal option you'd love any time of the day. The aim is to get them crispy on the outside while staying soft inside, and you can easily achieve this without using yeast.
The classic dosa batter is a mix of rice and urad dal (black gram). The typical ratio is 3:1, meaning three parts rice to one part dal. Soak these ingredients separately for about four hours. Once soaked, blend them together with a little water until you get a smooth yet slightly grainy texture.
Fermentation: The Traditional Twist
Fermentation gives dosas their unique tangy flavor. While commercial yeasts can speed up this process, you'll find that natural fermentation does the job just fine. Simply store the batter in a warm spot for 6-8 hours or overnight. This allows natural microbes to kick in and do their magic.
The Texture Test
A good dosa batter should have the consistency of pancake batter—neither too thick nor too runny. Test it by spreading a small portion on a pan. If it spreads easily into a thin layer, you're on the right track. A common beginner mistake is to pour too much batter onto the griddle, leading to thick pancakes instead of thin crepes.
Benefits of Going Yeast-Free
Using everyday kitchen ingredients not only simplifies the quick dosa recipe but also enhances their nutritional content. Natural fermentation is known to preserve nutritional value and make the dosas easier to digest, unlike the yeast-laden versions.
By demystifying the process and understanding these basics, you open the door to countless variations and flavor experiments. Whether you're a seasoned cook or new to the game, grasping these core elements sets you up for dosa success.
Yeast-Free Recipe Essentials
Ready to dive into the nitty-gritty of ditching the yeast for a batch of perfect dosas? The secret to cracking the code lies in simple, smart ingredient choices and knowing how to handle them. Let's get started!
Key Ingredients
The backbone of an awesome dosa begins with the right mix of rice and lentils. Opt for parboiled rice and split urad dal. A tried-and-tested proportion is a 3:1 ratio respectively, ensuring a smooth batter that's essential for that crispy dosa texture.
Another often overlooked ingredient is fenugreek seeds, which give a subtle lift to your batter. Only a teaspoon added while soaking the dal can heighten the naturally occurring yeast in the air, helping fermentation along.
"For that perfect dosa, 'practice' is the magic word," says Chef Krishna Vishwakumar, renowned for his innovative approaches to traditional Indian recipes.
Batter Preparation
After you've soaked the rice, dal, and fenugreek seeds for about four to five hours, it's time to blend. Aim for a smooth texture with a hint of graininess. Add water gradually while blending; you don't want it too runny.
Fermentation is the crux of a great dosa. Without yeast, warm environments are your best friend. Cover your batter and keep it in a warm kitchen spot for about 8-12 hours. You'll know it's ready when it's fluffy and has that slight tangy scent.
Additional Tips
- Adding a pinch of sugar can also boost fermentation speed. A neat little trick when you're tight on time!
- Ensure all your grinding tools are clean to avoid any unwanted bacteria that might spoil the batter.
- Got a cold kitchen? Try sticking the batter inside a turned-off microwave or oven overnight.
So there you have it! Crafting yeast-free dosas could not have been simpler. Now, let's get cooking and enjoy every crispy bite!
The Perfect Batter Consistency
Getting the batter just right is like hitting the jackpot in the game of dosa making. You've soaked your rice and urad dal, but what next? It's time to blend them down to a smooth mix. But here's the kicker: the batter shouldn’t be too runny or too thick, and that's where the perfect balance makes all the difference.
Crispy dosa surfaces because of the medium-thick batter. Aim for a pancake-batter-like consistency. When it sticks evenly to the back of a spoon without dripping too quickly, you're on track. Thin batter results in limp dosas, while thicker could lead to undercooked ones.
Blending and Adjusting
When blending, you might need to add water, but do it in increments. A good starting point is using cold water, about a cup for this basic quantity. Blend until everything feels smooth with a tiny hint of graininess — this aids in the crisp factor.
Test and Tweak
Don't be discouraged if the first one isn't perfect, this is your chance to test and adjust. Spread a small portion on your pan as a test run. If it's too runny, just give it a bit more blending time; if too thick, add a touch of water.
Understanding Fermentation Impact
Fermentation is key for that subtle sour taste. While yeast is out of the equation, nature’s got your back. Setting your batter in a warm spot overnight helps the magic happen. In a hurry? Try placing it in an oven with just the light on. It's quick and effective!
By keeping an eye on the quick dosa process, you'll soon master it and be ready to enjoy the classic crispy dosa every time.
Tools to Make the Process Easier
Making the perfect dosa without the fuss is all about having the right tools at your fingertips. Let's dive into some essentials that can make your dosa-making journey a whole lot smoother.
Non-Stick Pan or Cast Iron Tawa
The base of any great crispy dosa is a quality pan. A non-stick pan is perfect if you're looking to avoid sticking issues, especially in the beginning stages. For those who love a bit of tradition and extra flavor, a cast iron tawa can infuse your dosas with a distinct taste you can't get anywhere else.
Blender or Mixer Grinder
A good blender or mixer grinder is crucial for that ideal batter consistency. Look for one with sharp blades that can handle the soaked rice and urad dal mix with ease. It should be able to produce a smooth and slightly grainy batter that blends well — that’s your ticket to airy dosas.
Flat Spatula
A flat, wide spatula helps in spreading the batter evenly once it's on the pan. This tool is essential for getting that delicate thinness on your quick dosa recipe that transforms an ordinary dosa into a crispy delight.
Ladle
A medium-sized ladle is perfect for pouring the right amount of batter onto the pan. It provides control, ensuring you don’t end up with a lopsided dosa. It helps in maintaining uniformity with each serving.
Oil Brush or Drizzle Spoon
An oil brush or a dedicated drizzle spoon allows you to add just the right amount of oil around the edges. This technique ensures that each dosa gets its perfect golden brown crunch without unnecessary greasiness.
Armed with these tools, you're all set to make yeast-free dosas with less hassle and more yum. Investing in these kitchen companions not only improves the quality of your dosas but also cuts down on prep time, making it a win-win in your culinary endeavors.
Cooking Tips for Crispiness
Getting that signature crispiness in your dosa isn't as elusive as it seems. Here's how you can master the crispy texture at home.
Preheat Your Pan Just Right
A hot pan is essential. Before pouring the batter, sprinkle a little water on the pan. It should sizzle immediately, which means the pan is ready. If the water just sits there, give it more time.
Spread Evenly and Thinly
Use a ladle to pour the dosa batter onto the center of the pan. Quickly use the flat base of the ladle to spread the batter outward in a circular motion. This helps in achieving that even, thin layer crucial for making a crispy dosa.
Oil It Up for Crunch
Once the batter starts setting, drizzle a few drops of oil around the edges and in the center. This helps in enhancing the crisp factor and ensures that the dosa doesn't stick.
Keep an Eye on the Heat
While high heat is great for starting the cooking process, once you've spread out the batter, lower the heat a bit. This prevents the bottom from burning while allowing the dosa to cook evenly.
Patience is Key
Let it cook until it's golden brown and edges start lifting. Resist the urge to flip the dosa too soon. A properly cooked dosa will detach itself from the pan without much force.
These trusty methods will ensure your next kitchen adventure results in the crispiest, yeast-free dosas to hit your plate!
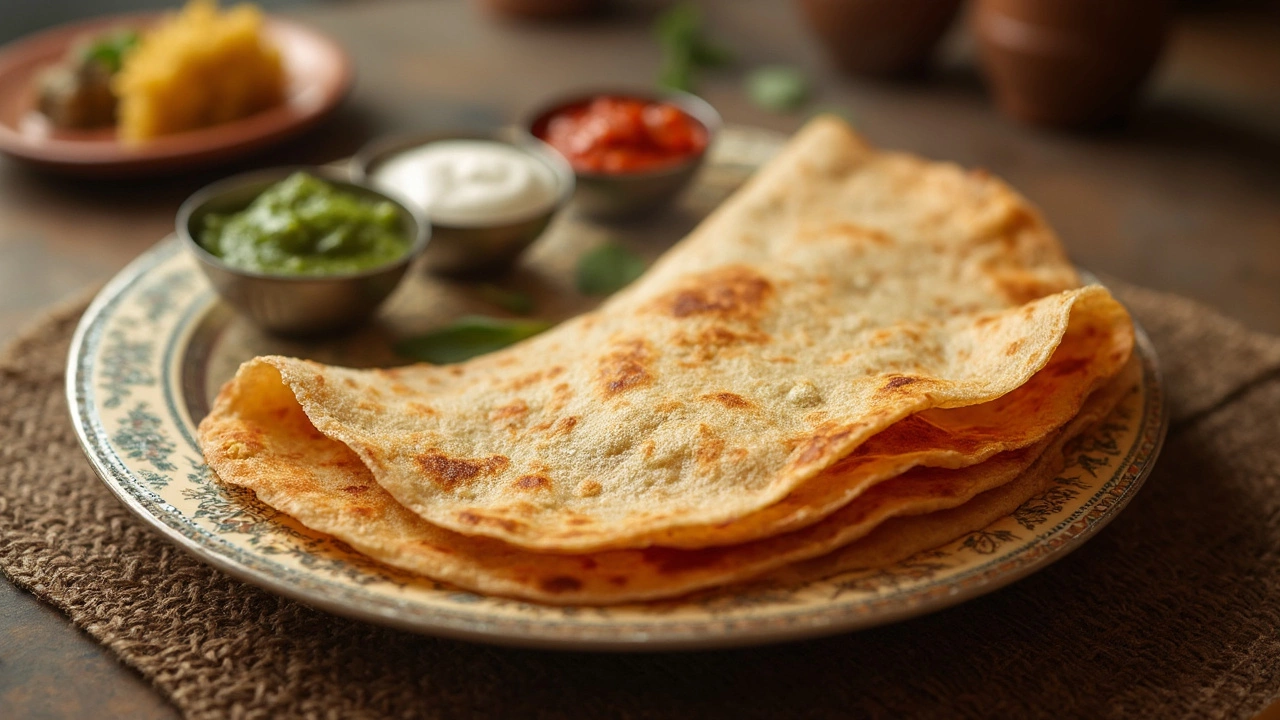
Serving Suggestions to Elevate Flavor
You've mastered the art of making crispy dosas without yeast, now let’s talk about making them even more delicious with the perfect accompaniments. After all, a dosa without its sidekick feels just a tad incomplete, right?
Classic Chutneys
Let's start with the ever-popular coconut chutney. This creamy delight is a blend of fresh coconut, green chili, roasted Bengal gram, and a sprinkle of salt. A quick blitz with some water, and you’ve got yourself a perfect dip.
Another crowd-pleaser is tomato chutney. Just sauté some tomatoes, onions, and garlic until soft, then blend with red chilies. You get a tangy, spicy partner for your dosa.
Sambar – The Ultimate Comfort
If you're in the mood for something hearty, sambar is your answer. This lentil-based soup brimming with veggies like carrot, drumstick, and pumpkin is a wholesome companion. Not only is it comforting, but it's also packed with nutrients - a win-win!
Innovative Twists
Feeling adventurous? Try stuffing your dosa with some quirky fillings. A scrambled paneer mix with spices or even a masala potato filling can do wonders. For the sweet tooth, think chocolate spread or mashed bananas with a drizzle of honey.
- Paneer Dosa – Spicy filling with sautéed peppers and paneer.
- Masala Dosa – The classic potato filling with turmeric, mustard seeds, and curry leaves.
- Chocolate & Banana Dosa – A perfect kid-friendly dessert dosa.
Tips to Impress
Presentation matters! Try cutting the dosa into bite-sized rolls or folding them into cones. They not only look appealing but also make serving easier.
Lastly, remember the side of fresh salad or pickles for a refreshing burst. A few slices of cucumber or a tangy lime pickle elevate your dosa feast to a new level!