Why Isn't My Roti Puffing? Common Roti Problems and Fixes
 Aug, 8 2025
There’s nothing more annoying than spending your precious minutes sweating in front of the stove, flipping one roti after another, dreaming of watching them puff up like little hot air balloons, only for them to stubbornly stick flat against the tawa. I’ve heard friends joke that making a perfectly puffed roti must be a genetic skill you’re either born with, or not. But let’s get real—it’s not in your blood, it’s all in your technique. There’s a bit of science hiding behind that golden dome of dough. If your roti refuses to puff, it might be holding a grudge for any of a hundred reasons—and you’re about to find out what actually matters.
Understanding the Science Behind Puffing Roti
Getting roti to puff is all about trapping steam inside the dough. When the rolled-out chapati is slapped onto a hot tawa, steam builds up from the water in the dough, looking for a quick escape. If both layers of your rolled dough are thin and sealed, the steam balloons up in the middle, making your roti puff. It’s boiling water vapor working its magic. But if your roti is too thick, uneven, or dry, the steam fizzles out through cracks or leaks before it can create the balloon effect. Roti puffing isn’t just aesthetic; it’s a sign of properly aerated bread, softer texture, and even cooking. According to a study by the Indian Agricultural Research Institute, ideal hydration and uniform rolling matter much more than fancy flour or expensive pans. Take a look at the physical interaction in simple terms: the dough’s gluten traps steam, and the high heat encourages that quick inflation.
If you’ve ever noticed rotis puff up more often in your grandmother’s kitchen, it’s probably because she nails the moisture-gluten balance and works the dough to just the right elasticity. Gluten, released from kneading the wheat flour dough, stretches and forms networks that trap steam effectively. The steam tries to escape but is forced to puff up the bread’s surface—as long as there are no gaping holes or cracks providing an alternative exit.
Common Reasons Why Roti Isn’t Puffing Up
Let’s skip the jargon and break down what might be going wrong if your roti turns out stubbornly flat every time. Nine times out of ten, it’s one of these:
- Dry Dough: If your dough feels tough or cracks while rolling, it’s not hydrated enough. Hard dough just can’t stretch and hold steam the way it needs to.
- Not Enough Kneading: Kneading builds gluten. If you’re in a hurry and skimp on kneading, your roti will lack the stretch it needs.
- Thick or Uneven Rolling: If the roti is thicker in the middle or at the edges, steam escapes from the thinner side and refuses to make a pocket. Uniform thickness is a deal-breaker.
- Cold or Wrongly Heated Tawa: The tawa needs to be hot—really hot. If it’s lukewarm, your roti will dry out before cooking through, sealing away any hope of puffiness.
- Skipping the Flip: Timing when to flip matters. Flip too early or too late, and the steam escapes or gets lost in overcooked dough.
- Low Moisture Flour: Sometimes, store-bought atta sits on shelves for weeks. Drier flour yields dry dough, wrecking your chances from the get-go.
All this boils down to just a handful of variables you can actually control in your home kitchen. Notice I haven’t even mentioned special oils, ghee, or any secret grandparent hacks yet—because these fundamentals work, always.
I once tried a side-by-side test: two balls of dough, same flour, but one kneaded for five minutes, one for fifteen. The one kneaded longer gave way to pillowy, puffed rotis. Even Vihaan, my son, was impressed. He called them ‘volcano rotis’ and demanded two extra. The same night, Anisa grilled me on my technique. She’s better at rolling evenly, but my dough prep finally felt next level.
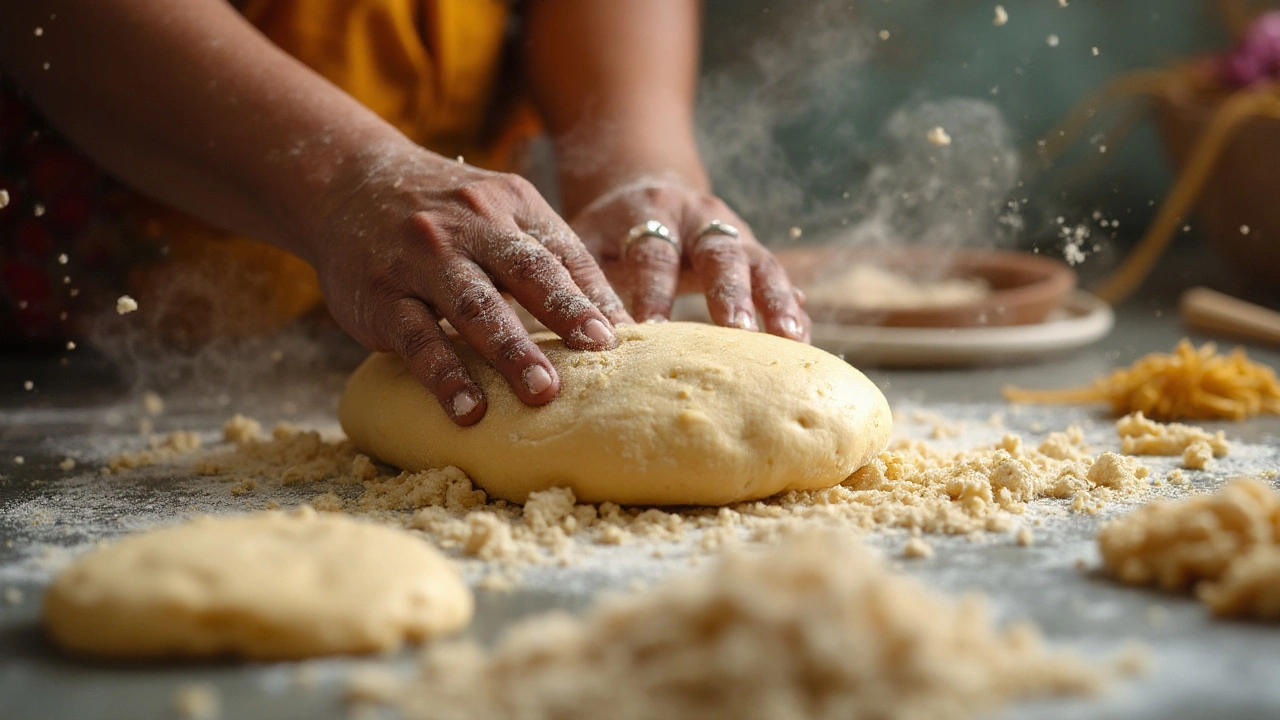
Kneading – The Foundation for Puffed Chapatis
Good roti starts with good dough. Most issues come from not putting in enough effort at this stage. Start by using fresh atta. Add water gradually, not all at once. The right ratio is around 1 cup flour to just under 0.5 cup water, but environment matters—Bangalore’s humid summers demand slightly less water than winters.
Start mixing with your fingers until there are no dry bits. Then, knead—and don’t rush it! Ten to twelve minutes isn’t overkill. You want a smooth, almost bouncy dough. It should feel soft, elastic, but not sticky. If you poke it and the indentation bounces back slowly, you’re golden. You’ll notice the dough getting smoother and springier as the gluten develops.
Letting the dough rest for 20 minutes makes a huge difference. This relaxation helps the gluten network settle, making the dough easier to roll thin without tearing. Cover the dough with a damp muslin cloth or a tight lid. If it air-dries, your roti will end up patchy and refuse to puff.
One quick trick: If you want softer chapatis, knead with a splash of warm milk instead of just water, especially during winter. This helps with both hydration and softness.
There’s also evidence that excessive oil or ghee in the dough can block gluten formation, so keep fat minimal if you’re after truly puffed rotis—save the extra ghee for brushing after cooking.
Rolling and Shaping – Why Technique Rules
Here’s where most of us get stuck. You don’t need a master chef’s rolling pin skills, but there are a few things that can help. First, divide the dough into even-sized balls—about the size of a lemon is standard. Dust with just a pinch of flour so it doesn’t stick, but avoid over-flouring as that dries out the surface during cooking.
Flatten the dough gently and start rolling from the center. Use light, even pressure. If you notice the dough thickening at the center or cracking along the sides, pause and even it out. Try aiming for a thickness of about 2mm. It might sound nerdy, but uniform thickness is everything.
How do you check for shape? Instead of a ruler, eyeball it: the roti should easily fit onto your tawa without the edges hanging over. Irregular edges mean the steam might slip out; rounded edges help form a better seal.
- If you accidentally roll too thin, it may tear and steam will escape.
- If you roll too thick, the inside won’t cook enough to create steam, and the outside might burn.
Don’t stretch or tug the rolled dough. Let it rest for a minute before placing on tawa—it helps any gluten tension relax.
Cooking Roti on the Tawa – Heat and Timing
This is the make-or-break moment. Your tawa (griddle) should be screaming hot—if you sprinkle a few drops of water, they should sizzle and evaporate instantly. If you use a non-stick pan, you’ll often struggle; traditional cast iron or aluminum tawas retain heat better, and that’s crucial.
Lay the rolled roti on the tawa, wait for a few tiny bubbles to appear, then flip to the other side. The first side should only be in contact for about 20–30 seconds before you flip. Don’t wait for big brown spots yet. After flipping, cook for about 30 seconds again, till you see bubble formation and light browning.
This is when you can lift the tawa, flip the roti directly onto the open flame (if you have a gas burner) using tongs, and watch as it puffs gloriously. If you only have induction or electric, press very gently with a cloth on the cooked roti and see if it balloons. But if nothing happens, check rolling and hydration again.
One hack: If you see puffing just start but then deflate or halt, it’s usually an edge leak—work on pinching edges tighter and rolling evenly. Also, resist the urge to press down too early or with too much force. Light, quick presses do the trick.
If you’re cooking several rotis at once, wait for your tawa to reheat between each—don’t pile on one after another rapidly, since that drops the surface temperature.
| Common Issue | Likely Cause | Fix |
|---|---|---|
| Roti dries out while cooking | Low dough moisture, cold tawa | Add splash of water to dough, heat tawa well |
| Partial Puffing Only | Uneven rolling or cracks | Roll dough evenly, check for cracks |
| Roti burns before puffing | Tawa too hot, too thin dough | Lower heat slightly, check dough thickness |
| No Puffing at all | Poor gluten network, under-kneading | Knead dough longer |
Now for the fun part—when you actually get it right and it puffs up, brush it lightly with ghee. Watch everyone dive for the top roti in the stack (it’s the softest) as soon as you serve. In my home, this almost causes an argument!
Pro Tips and Lesser-Known Roti Tricks
Ready for some next-level secrets? Aside from the standard steps I already covered, a few side-steps can make even average attempts outstanding:
- Try mixing half a teaspoon of curd or yogurt into your dough. It boosts fermentation a bit, upping softness without sacrificing puffing.
- Buy flour in small batches. The older the atta, the drier it gets, and it loses gluten strength.
- If Bangalore’s humidity is making your dough sticky, reduce the water gradually and use slightly more flour for dusting.
- For really consistent puffs, give the rolled dough a light shake between your palms before placing it on the tawa. It relaxes excess surface tension.
- Press with a clean kitchen towel instead of a spatula; it helps distribute gentle heat and negotiates tiny air bubbles into big puffs.
- Store cooked rotis in a container lined with a cotton cloth, folding the cloth over the rotis; this traps moisture and keeps them soft for hours.
- Always serve fresh. Refrigerated or microwaved rotis rarely puff, even if you reheat them with water sprinkles.
Here’s something not many know: in a test by the Central Food Technological Research Institute, rotis rolled with warm water instead of cold showed a 12% higher puffing rate, most likely because gluten forms better in warm environments. Turns out, a little science plus old-school muscle makes magic happen.
I’ve had my share of kitchen disasters—there’s nothing like the sharp disappointment of a batch of tough, rubbery, flat chapatis when you were hoping to impress your spouse or coax your picky eater into taking ‘just one more bite.’ But the more you practice, the easier it becomes. You start noticing the subtle changes: dough texture changes, the difference heat makes, how one second more on the tawa can be the difference between meh and magical. Each roti becomes a lesson in patience and attention. So, the next time your roti refuses to puff, just remember—science, technique, and patience are the only real family secrets you need.
And if you finally figure it out, don’t forget to brag. In my house, perfect puffed rotis trigger a family WhatsApp message to my mum, who always replies with a proud “Beta, you’re now a real cook!” That’s the reward, really.