Full Fat Milk for Paneer: Why It Matters and How to Use It
When you make full fat milk for paneer, the base ingredient that determines texture, yield, and richness of homemade Indian cottage cheese. Also known as whole milk, it’s the only kind that gives you paneer that holds shape, melts just right, and tastes like it came from a small-town dhaba. Skimmed or low-fat milk? It won’t work. You’ll get crumbly, dry, rubbery chunks that fall apart in your curry. No amount of pressing or soaking fixes that. The fat in whole milk binds with the proteins when acid hits it—forming a smooth, cohesive curd. Without enough fat, the curds just break apart like wet sand.
It’s not just about fat, though. The quality of the milk matters too. Fresh, unhomogenized milk from local dairies gives the best results—natural cream rises to the top, and the proteins are more active. Pasteurized, store-bought milk works fine, but avoid ultra-pasteurized or UHT milk. Those have been heated too high, and the proteins get damaged. They won’t coagulate properly, even with lemon juice or vinegar. You’ll end up with watery curds and half the yield you expected. And don’t even think about plant-based milks. Almond, soy, or oat milk? They don’t contain the right proteins. Paneer isn’t tofu. It needs dairy.
The amount of milk you use changes everything. Most recipes say 1 liter makes about 200–250 grams of paneer. That’s correct—if you use full fat milk. If you use milk with 3% fat or less, you might get less than 150 grams. That’s a 30% loss. And you’re paying for that milk. So if you’re making paneer for butter chicken or palak paneer, you want every bit of yield. Use milk with at least 4% fat. Look for labels that say "whole milk" or "full cream." In India, that’s often labeled as "full fat milk" or "full cream milk." It’s the same thing.
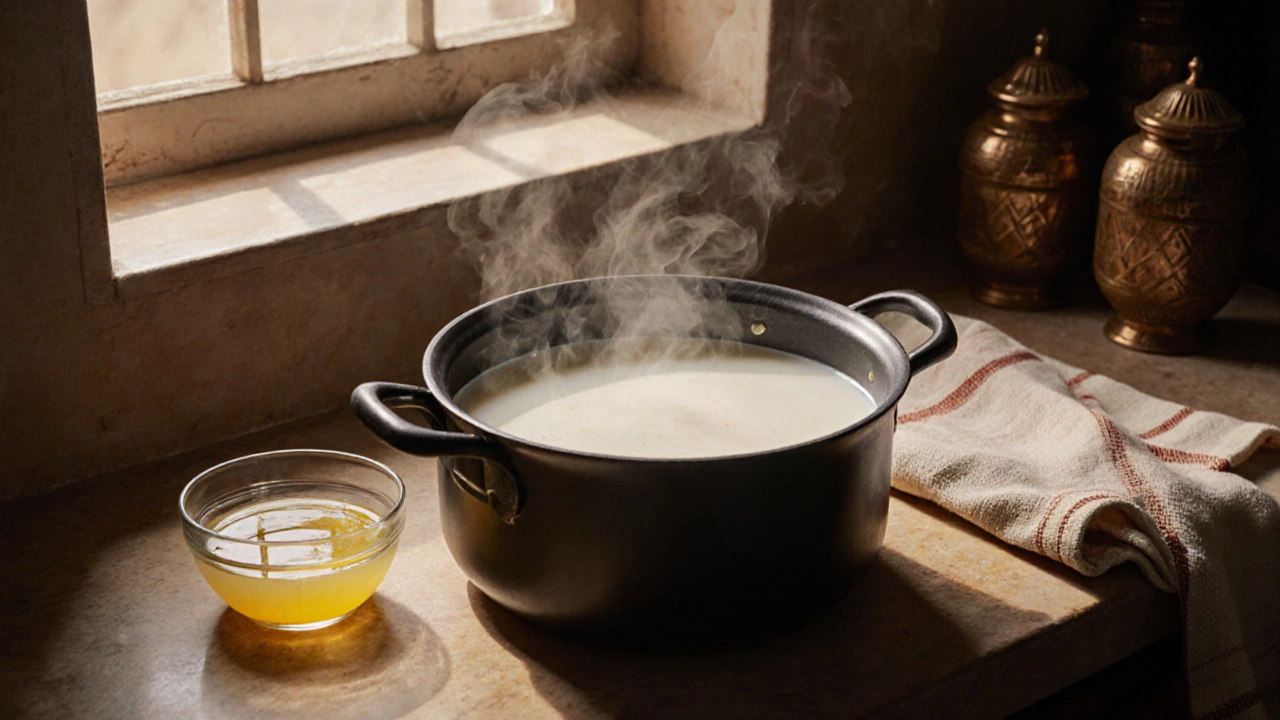
Heat matters too. Don’t boil the milk too fast. Let it warm gently. Bring it to a slow simmer, then turn off the heat before adding acid. Boiling hard makes the curds tough. Add lemon juice or vinegar slowly, stirring once or twice. Let it sit for 10 minutes. The curds will separate cleanly from the whey. Then strain it in a muslin cloth, tie it up, and press with a heavy weight for 30–45 minutes. That’s it. No fancy tools. No shortcuts. Just full fat milk, heat, acid, and time.
People ask if you can use milk powder or condensed milk. No. Powdered milk lacks the natural structure. Condensed milk has too much sugar. Both will ruin the texture. Stick to liquid whole milk. It’s the only reliable way. And if you’ve ever bought paneer from the store and thought it tasted bland or rubbery? That’s because it was made with low-fat milk or additives. Homemade paneer from full fat milk is creamy, slightly sweet, and holds up in curries without falling apart. It’s the difference between a good dish and a great one.
You’ll find recipes here that show you how to make paneer in under 30 minutes, how to store it for a week, and even how to use the leftover whey in soups or roti dough. You’ll also see why some cooks add a pinch of salt to the milk, and why others don’t. There’s no single right way—but there is one rule: skip the low-fat milk. It’s not worth the disappointment.
Best Milk for Homemade Paneer: What Works and Why
Full-fat cow or buffalo milk is best for homemade paneer. Low-fat, skim, or ultrapasteurized milk won't work. Learn why milk quality matters and how to get perfect paneer every time.